
Apparently, they made the hole in the wall as tall as the old thermostat and the newer one was much more compact. Uh oh... We now had a few gaps above and below. The nice thing was that the mounting holes lined up! Minor success with an overall project failure. The only thing to do was to repair the wall. The problem was that it was going to be a little bit more than just a bit of putty. After discussing the issue with my dad, I had a plan of attack.

Here's that I did.
Step 1: Find scrap wood or shims to create a back to build the putty on. Fortunately, I had left over strips from our door project: How To: Build A Custom Door. The strips were ripped thin enough that all I had to do was to cut it to length.
Step 2: Cut the wood to length. Drill a hole to feel the wires through. Make sure it is large enough to feed the wires through easily.

Step 3: Feed a rope through the hole and tie it where you can remove it. I used a ribbon since it was lying around. Feed the wires through the hole.


Step 5: Support the wood to have it mostly centered in the hole. I used a paint stirrer to keep it up.
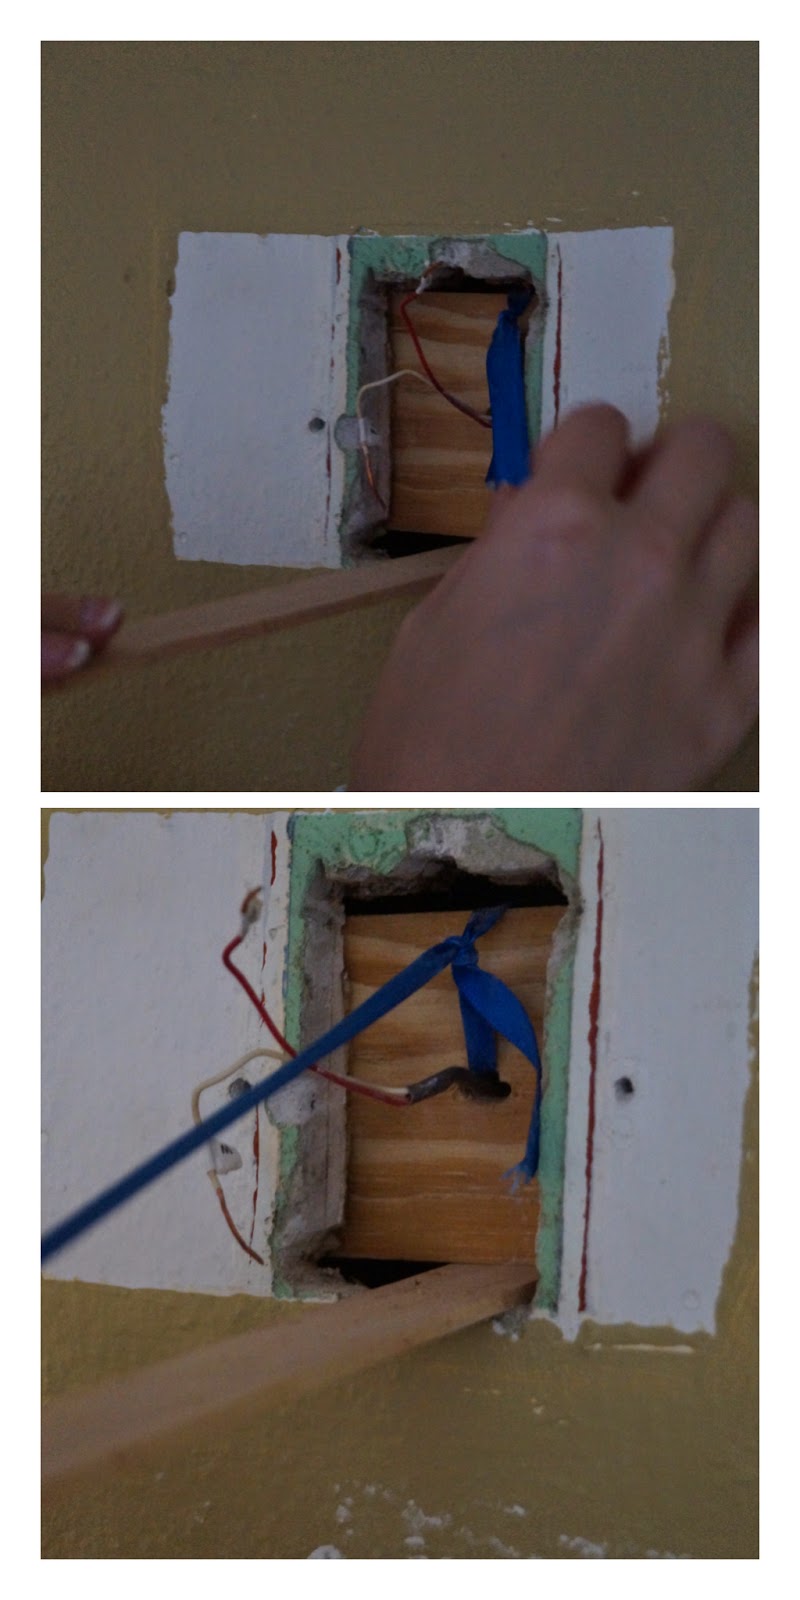
Step 5: Drill a couple pilot holes then screw the wood to the wall.

Step 6: Putty the hole to fit. I was impatient (shocking, I know!) so I used a hair dryer to speed up the process.

Step 7: Sand and paint.

Step 8: Install new thermostat.

Project complete!! I'm very happy with how it turned out!

My sister was a huge help during this process. She took the lovely pictures and was happy to "hold this." Thanks Amy!!
No comments:
Post a Comment